Sunday, April 26, 2009

Building a new 'lighter' Communal Whiteboard


Its nearly been 3 years since I made my last whiteboard, and I thought it was time to do some tweaking to make a more 'lighter' version.

This 'lighter' version removes the troublesome overlay tools, that seemed rarely used... and focused on just one 'Pointer'.
It uses the newish - llDetectedTouch functions - which allows a user to touch anywhere on the image - and the pointer will move to it. This is so much more friendly than before, originally I had to take control of the avatar - and use arrow keys to move the pointer around, which was made worse when the SL client had the 'Release Keys' button removed.

The new whiteboard can also be turned to any angle, without effecting this function... again the original used sim co-ords, so you had to stick the Board either North,South,East or West facing, and soooo many people wanted it at 45 degrees in the corner of a room.

You can also 'Scale' the board to fit your place, without any adverse action to the Aspect Ratio button on the board - which now set to be proportionate of the scaled board's size. So resize the board down to 2ms wide if you want it in your office, or keep it 10ms wide for the lecture hall.

It still keeps the most important thing though .... group access.

Allowing other avatars to add images to the board by holding down the CTRL key while dragging images/textures over it and also allow other avatars to delete images from the board's slideshow.

A simple addition but it allows a group to add to and edit a group slideshow / photoessay.

If you are more of the didactic nature, you can always switch on the Lock, which only allows the Owner to work with the board.

So, just giving it a little roadtest first, and then in a week or so... put it out in the wild.

Wednesday, April 22, 2009

Creating Content in Second Life ( slideshow )

Presentation from Learning in Virtual World Conference at Sunderland on 21st April 2009 - supported by RSC-Jisc Northern and HE Academy.


This slideshow is aimed at people with little to no knowledge of content creation tools in Second Life.

Using the Multi-Cam Machinima Switcher

A while ago, I built a multi-camera switcher in Second Life, when the new CameraParameters function was added to LSL....[link] , a little while later I updated it - with cam points the user could move, via editing the linked prims...[link] and then eventually I got round to writing a blog post about it. ( amazing what you can achieve in 3 years ... )

WHAT is the Multi-Cam Machinima Camera Switcher (MSMCS)?

This tool creates instant vision cutting between 8 camera setups much like a TV Vision Mixer swtiching between multiple cameras in a studio. Using the MSMCS you can block out a range of camera positions, that when you go into production, you can jump between. This is particularly suited for when Machinima is streamed LIVE out of Second Life particularly Interviews style shows, allowing the camera operator to cut from Closeups of Avatars to a wider shot of the stage etc.

For educators, this tool can also be used to exlpore conventions of Film and Video production, particularly Crossing the Line ( 180 degree rule ) or Jump Cuts. As well as developing an understanding of Multi-Camera shoots, when access to Real Life equipment is limited. Also it could be used as a way of quickly developing animatics for video productions.

For Machinima Filmmakers - understand the limitations of this tool, it may be useful for some circumstances and not for others.


HOW to USE the Multi-Cam Machinima Camera Switcher. (MCMCS)

1. Build your Set, Stage, Interview Room.....


2. Rez the MCMCS - and place the big grey square so its somewhere in the middle of your set.


3. Whilst in 'Edit Mode' - move the MCMCS vertically down until the big grey block is under your set...


4. Now to edit the individual cameras - in edit mode panel - click on edit linked parts --- ( click on image below to enlarge it )


5. Each Camera is identified by Colour and settext above it... ( red is camera one ) - the sphere prim is the camera's position , the cube prim the camera's target (ie. where you want to look). Whilst in edit linked parts mode, move the sphere and cube prims to set up the camera shot.


6. Sit on the camera to see what the shot looks like... ( sitting on the camera makes all the cam prims and particles disappear )


7. Camera One ( the red one we just edited ) is selected by pressing the Up Arrow, and your camera view should be updated like so...


8. Stand up your avatar , and go back to point 4, and repeat the process with all the other coloured pairs, to give you upto 8 different camera shot framings.
Each Camera Prim has floating text above them denoting the camera number and the corrosponding arrow key that needs to be pressed.

-------

If you think this is useful for you - you can pick up a copy outside my TechGrrl Store for L$ 25
http://slurl.com/secondlife/Gourdneck/197/233/67

Thursday, April 16, 2009

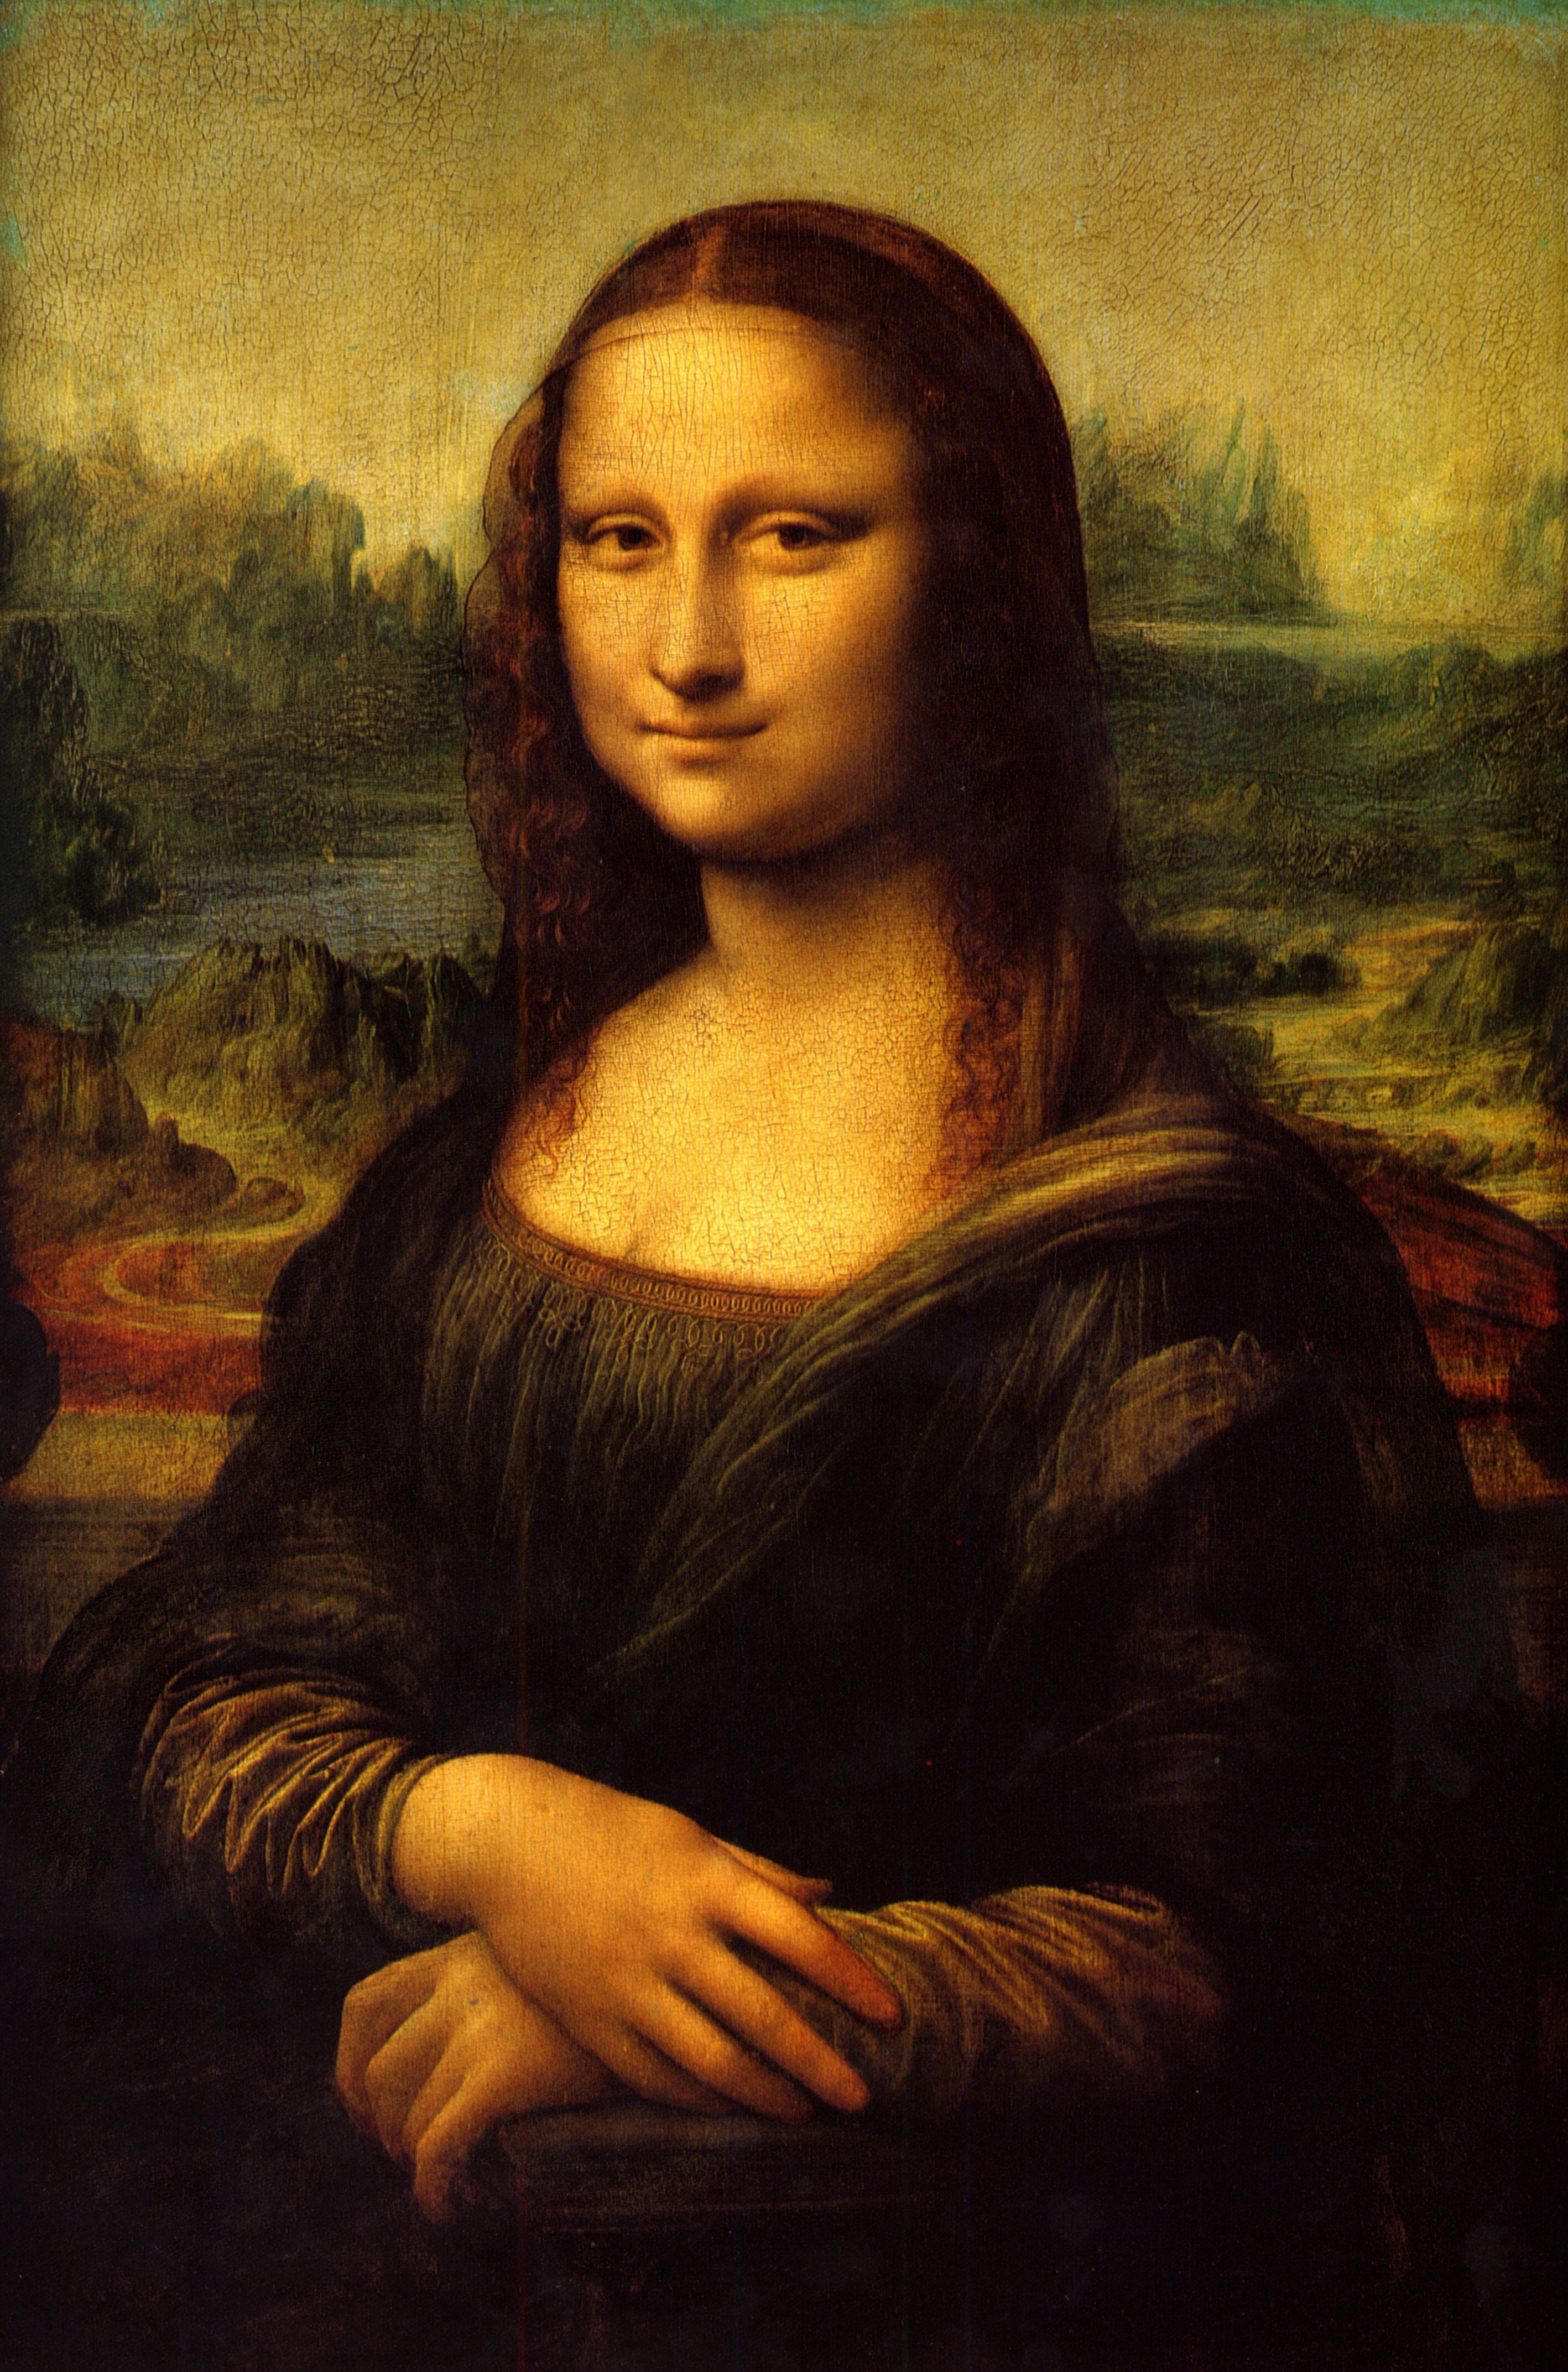
How Big is the Mono Lisa?


Mona Lisa, 1503-1506, Leonardo da Vinci

unless you've been to The Louvre, most of us have experienced this painting through books, the web and student posters... but actually how big is it?

Basically I'm having some thoughts on how to entice the Critical and Contextual Studies dept onto our Second Life island...

A quick straw poll of students around the college when asked how big was the Mona Lisa, only a few could give an accurate size. Though all are familar with the history of the painting, the feeling for its real size is, I suspect, skewed by props on TV & Film, seeing the picture on the web, and proportionate to its famousness.

The Mona Lisa is 77cms x 53cm ( 30inch x 20 7/8inch )

One thing I've always liked about Second Life galleries is you can get a sense of scale of a painting or image
(as the artist may or maynot of intended), something that's lacking when you see the same image embedded in a webpage or powerpoint presentation.

Having the avatar to scale the art against at least starts lending itself to an understanding of the intentions of the artist..

Here's Pablo Picasso's
Guernica, again you can get some engagment with the scale of the piece, which would be lacking from a book or web-based picture.

With a bit of skill, a tutor, rather than using a powerpoint presentation, could present a virtual tour of a gallery space
( be it as a group, or simply a tutor's view presented on a video projector ) could create even more opportunities to discuss the art works.

I'm using fine art works as an example - but the same principle could also be applied to graphic design and advertising - looking at the use of scale with posters & billboards, by placing them in galleries as well as simulated spaces (eg. shopping mall ) -
( hmm, maybe a corporate example, but hopefully you get the point ) - allows for a critical discussion of how the image works in the space and its intended audience. Particularly useful for spaces, that students might not get ready access to.

Secondary, having a 3D online gallery to place work in, is also a great tool to explore some of the curatorial skills of a putting an exhibition together. Not only does a student have to sort out the collection of images, but can think about how they are placed within the space, and against each other. This can translate to a real life show - allowing several options to be considered before hanging the work.

One thing to take into account is Second Life's propensity for taller than average height avatars,
and the default camera position - does make things feel smaller than reality, so playing with the camera ( viewing in mouselook ) and using other props that allow for a sense of real world scale will compensate for this.

Personally, I still think its important to go on the physical field trips to a gallery when one can, but its great to see projects like this arriving in Second Life - a replica of The Old Masters Pictures Gallery, Dresden - that's only a TP away..


SLURL - http://slurl.com/secondlife/Dresden Gallery/128/128/27